TRI to keep it WILD - Raising funds for Nature Conservancy of Canada

Showing posts with label cedar strip canoe. Show all posts

Sunday, June 28, 2009

Thistle

June 28, 2009. She's done. Its 95 degrees F today. A hot day for working, but worth it as I finished Thistle today. All that was left to do was install the seats and thwart and take some photos. Now I'm sitting on the back patio with a beer. ahhh. Its a bit unbelievable to me that I am done building. It was hard to imagine ever finishing at times. Now I'm just looking forward to getting up on a mountain lake. Lots of people helped me out along the way. Thanks to John Mould for lending me so many tools - sometimes for months at a time. Thanks to Andy Orsini without whose help I never would have been able to machine the red cedar strips from full boards or cut the gunwales. Thanks to our great (former) neighbours, Ben and Nicole, who never complained once about me taking over our shared garage. I really wanted to finish before they left, but I missed by a week. At least they only moved a few doors down! Thanks to my parents for getting me started with gift certificates to Home Depot. And most importantly thanks to Tracy for letting me disappear for hours into the garage for a year and half and also for helping me with the worst tasks (epoxying).
So after taking a lot of photos we conducted the inaugural weigh-in. And she weighs .... 55 lbs! A little heavier than my initial goal of 50 lbs, but really not too bad. I think I can portage her for a kilometre perhaps. I was afraid she'd be over 60 lbs near the end.
It will be a couple weeks before we get her in the water as we're heading home to Ontario for the long weekend coming up. I think the launch party will be the weekend after.
So, thats it. Welcome to Doneville, population me.


Saturday, June 27, 2009

Penultimate Update


Varnishing is the least enjoyable process in the canoe build, but produces the most satisfaction. It is a constant battle against the forces of dust, fumes and drips. Dust is everywhere and I became obsessive about removing every last speck. That is a difficult thing to do when working in the garage of an old house, especially while Ben and Nicole (the other half of our duplex) are moving out. I swept and vacuumed repeatedly, including the walls and ceilings and the driveway outside. After sanding coats I would vacuum the hull and wash it with a wet towel and wipe it down with a dry one. Then before a new coat I would wipe it down again and then go over it a couple times with a tack cloth to remove the final specks. While applying a coat I would lower the garage door to about a foot from the ground and stuff plastic sheeting in the cracks between the panels to prevent dust from entering. Even doing this I had to wait until 8pm at night when the wind died down to keep dust from blowing in. Mostly closing the garage door brings up the next evil: fumes. An hour of leaning over the freshly spread varnish for an hour in the closed space could make me loopy in a hurry. I pilfered a desktop fan from work to exhaust air under the garage door for the first coat. Air could flow in over the top. This helped, but I grabbed a second fan from work for the final five coats and the two fans on high prevented me from getting high instead. The last scourge of canoe varnishing is drips or runs in the varnish. I found that the varnish would spread on nicely and evenly with no sign of drips until the coat began to skin over on the surface. Somehow at this stage it could still flow underneath and I'd get these wide sagging drips around the turn of the bilge. By the time these were apparent though, it was too late to do anything about it since the varnish was already half dried. The only way to prevent it was to ensure a thin coat to begin with. The badger hair brush was definitely the nicest brush I have used (it doesn't shed at all), but in the end I found it was easier to get a thin, even coat with the 99 cent foam brushes (and I didn't have to clean them!). Warmer temperatures also seemed to help because the coat would set quicker.
Well last night I finished the last of 3 interior coats and 3 exterior coats and I'm glad its over. The results will speak for themselves. Tomorrow I plan to wrap this project up - installing the seats and thwart and taking the victorious final photos! My Mom brought us a bottle of fine Champagne a couple weeks ago and I can't wait to pop the cork.

Tuesday, May 26, 2009

Badger hair


Decks, check. Gunwales, check.

Took advantage of the Memorial Day long weekend to not spend all my days off working on the boat, so Tracy and I spent Saturday hiking at Point Reyes. After picking up some Red Hawk cheese from the Cowgirl Creamery we found a new 12 mile loop starting at Muddy Hollow off of Limantour Rd on some trails we haven't been on before. Great spot - for a holiday weekend we only saw three other groups of people the whole time. We climbed up through a tunnel of trees to the top of Pt. Reyes Hill at 1300' for a good view over Tomales Bay and then headed back down near Drake's Estero past a wary group of cattle and over close to Limantour Spit before heading back to the car.
Sunday I finished trimming the trim and sanding the decks and I installed a "handle" made from a leftover piece of ash outwale spanning between the sides of the hull under each deck to reinforce them. They don't add much weight, but make the decks stronger and look stylish to boot.
On Monday I fit the seats, but didn't fully install them. That will be the very last thing after I'm done varnishing. I used the suggested seat jig recommended by Canoecraft. As usual with their recommendations, it worked.
I picked up everything I need for varnishing from West Marine as well. I went with the Epifanes high-gloss clear spar varnish. Its the best stuff out there with a price to match. And I picked up a badger hair brush. Who knew badger hair was the perfect thing for applying varnish?? Apparently it is.
Since it takes at least a day for each coat of varnish it doesn't look like I'm going to get the boat water ready for my Mom and sister's visit next week. But at least they'll be able to see it in pretty much it's finished form.
Next up is another cleaning and thorough dedusting of the garage before I varnish.

Sunday, April 12, 2009

The Trim, Part II


It might be taking a little longer than I originally thought it would, but bit by bit the canoe is nearing completion. In the last three weekends Tracy and I put on the final coat of epoxy on the inside of the hull. It looks pretty good, with just a bit of the fibreglass weave providing a pebbled surface for some traction. I think I finally got my squeegee technique down on the last coat and it won't need any real sanding before applying the varnish.

I spent quite a bit of time planing the tapers into the inwales and cutting and fitting them to length to fit precisely in the boat. Yesterday and today I epoxied them on with Tracy's help. As with most things on the boat, it worked out pretty well with only a couple minor problems that probably only I will notice. I bought three more clamps on Saturday morning before I put the starboard gunwale on, but found I could have used even more to get the inwale on as snug as possible. I ended up using a couple homemade clamps to get the job done and today I went out and bought 4 more clamps before putting on the port side. It's true that you can never have too many clamps. I'll put in some 1/2" stainless screws for extra strength too before I put on the outwales.

Sunday, March 1, 2009

The Trim

It's pouring rain this Sunday afternoon so I'm catching up on the documentation instead of working on the canoe. With the hull mostly finished it is time to work on the trim. I knew what I wanted for the gunwales, but I couldn't get it done by myself in the garage so I drew up some plans, emailed them to Andy and recruited his help to get them done. I always learn a lot working with Andy as he shows me lots of woodworking tricks. He follows the mantra of spending a little extra time building a good jig will get the job done right and save time in the end.


The gunwales are made up of an inwale and an outwale on each side of the boat. A fair bit of milling was needed to shape them how I wanted. The inwale and outwale are each nominally 3/4" x 3/4", but I added a slight bevel on the side that attaches to the hull. There is a little bit of tumblehome (curving inwards) of the shear line at the middle of the boat so the bevel should help make the top of the gunwales horizontal instead of slanted. I will have to plane off the bevel towards the stems where the sides of the boat are almost vertical. We also beveled the bottom of the outwale to make it a little more elegant and lighter and rounded off the outside corners of both inwale and outwale. There are eight 6" scuppers on 12" centers on the inwale. Since I could only find 13' long ash boards we also cut scarf joints on the ends of the strips to join another 4' long piece on each. Andy constructed a sled jig for the table saw that made these joints perfectly. It can be seen in the photo with Andy. To cut the scuppers we used a router and made a jig to hold the inwale and cut four identical scuppers at a time spaced the correct distance apart. This jig was simply two flat strips of wood spaced 3/4" apart with another strip of wood that positioned the inwale in the right location when it was all screwed together. The top strip had the scupper forms cut into it for the router bit to follow. Andy also likes to make extra copies of everything so now I have three sets of gunwales! I guess I'll use the best ones for now and keep the other two for my next two boats!


Taking advantage of the workshop and the joiner I picked up a nice piece of Western Red Cedar from Minton's before heading over to Santa Cruz and brought along the extra Port Orford Cedar from making the inside stems and we cut some boards to use for making the bow and stern decks. They will have a half inch stripe of PO Cedar between two WRC halves. I will epoxy these together and shape them with the chisel and plane.


I strapped long gunwale pieces back onto the roof racks to bring them home, wrapped in plastic because of all the rain.
I also ordered the seats last week. I went for the plain straight ash seats. There are contoured ones that looked pretty nice, but I decided that someday I might make my own seats so its probably better to just get the standard ones for now - I don't want them to outshine my own handiwork! I ordered from edscanoe.com in New Hampshire. They look pretty nice on the website and they're less than half the price of Bear Mountain Boats' seats. They have a return policy so if I don't like them I can replace them. They should be here in a couple days!

Hot Valentine's Date

I'm a little late on writing down what I've done on the canoe recently. I've had some productive weekends in February though. After my last entry about scraping the inside of the hull I went at it with the 80-grit on the ROS and then sanded it down to a smoother finish with 120-grit paper wrapped around a couple of tightly rolled up magazines. After sanding I wet it down with a damp cloth. Dampening the wood swells the fibres and reveals where more sanding is needed so I repeated this process a couple of times.
With the inside finished it was time to get out the epoxy and fibreglass again. The timing for this activity just happened to coincide with Valentine's Day. Now that Tracy and I have been married for a few years, the traditional fancy meal out has been done so what says "I love you" better than spending a day together with face masks, rubber gloves and toxic chemicals? It's a two person job for sure and Tracy and I have a good system down. She mixes, keeps track of where I am and touches up the spots that I don't have time to get to. We rolled out the glass over the inside and I cut it where I thought it should end. After making the cut though it seemed a couple inches short. I'm not really sure how I did that, but I had little choice but to live with it. The glass isn't supposed to go all the way to the ends anyways and it will be covered by the deck on the one end that it is a couple inches short. I don't think it hurts the integrity of the boat. The inside is a little trickier than the outside because the glass tends to pull away from the hull if you tug on it. I was more aggressive with the squeegeeing this time. I only want to use two coats of epoxy on the inside so it is much more important to eliminate the drips and puddles. For the most part I think it worked out great. I got a little bit zealous with the squeegeeing towards the end and I tugged the cloth a little two much causing some wrinkles. Once this happenned I tried to tug on the cloth diagonally to get rid of the wrinkles and this just caused more. As I was trying to get rid of these the epoxy was starting to set making it more and more difficult. After a while I realised that everything I was doing was just making it worse so I packed it in and crossed my fingers. Now that it is fully set I can certainly see the wrinkles, but the fabric isn't exposed and its not glaring - probably not noticable unless you're looking for it and it will be underneath the stern seat. Well those are my canoe confessions for today. I guess anybody reading this will now know what to look for! :-P

Tuesday, February 10, 2009

Scraping the inside


Work on the canoe has been going pretty slowly in January. I've been running a lot more these days and it takes up time on the weekend. The coming Presidents' Day long weekend should be productive. Tracy has promised to help me with fiberglassing the inside on Saturday, Valentine's Day. Now that is true love! And I've got an appointment with Andy in Santa Cruz on Monday to machine the gunwales. After calling a couple places, I haven't been able to find any Ash or Cherry boards longer than 14 feet so I will have to scarf together a couple to get the full length of the canoe. I'll try to get some from Minton's on Saturday even though they never called me back about getting longer boards. The guy at Jackel in Watsonville was good about getting back to me, but Minton's is less than a mile away.

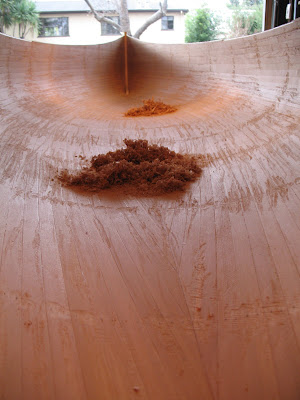
Since flipping the canoe over I have scraped and sanded the inside. I tried with my cabinet scrapers first, but whether it was my technique or the scrapers, it wasn't getting the job done, especially on the epoxy globs that had seeped through the staple holes. So following the advice of countless people on the Bear Mountain builders' forum I ordered a Pro-Prep scraper. It was much more effective although I still found it difficult to get as nice shavings as I do from a plane. Sharpening the Pro-Prep with my diamond block gave a super-sharp edge for slicing through the epoxy. The image after scraping is above. I have also sanded and it looks a thousand times better now, but I don't have a photo yet.

Sunday, January 11, 2009

The flip


I just checked and my last canoe post was at the beginning of November. I really didn't do much between American Thanksgiving and Christmas. It was kind of a busy time with work and getting ready to go back to Ontario for the holidays. Oh yeah, and I was making my Mom a warping board for her weaving, which took up a couple weekends.

But there is some progress on the canoe to report. After the first layer of fibreglass I added two extra strips of cloth over the bow and stern stems for a little added durability. These blended in fairly well and shouldn't be noticeable once all of the varnish is on. Then I applied two more coats of epoxy - squeegeeing on the first and brushing on the last. Afterwards I waited a couple weeks for it to fully cure and then scraped off all of the drips with a cabinet scraper. As most first-time builders do I think I put on the epoxy too thickly. Oh well, it is better than not putting on enough. It just means more work at this stage with scraping and sanding. I didn't do much else till Tracy and I returned from the holidays at the start of January. The first weekend back I was eager to get to work again and I got through the grueling task of sanding the epoxy smooth. It was grueling mostly because I put on too much epoxy and it was quite uneven in places. With the power sander starting with 80 grit and moving to 120 grit after one pass I leveled and smoothed the surface of the epoxy. This is supposed to be important in achieving a flawless uniform glossy finish at the end. I spent about 6 hours without break sanding. The dust gets everywhere and I didn't feel like cleaning up to eat until it was done. I spent three to four hours the next day cleaning up the mess from all the dust. During sanding I would pause every once in a while to vaccuum off the canoe. I found that a fibreglass canoe and a plastic vaccumm make an excellent static electricity generator! ouch. All in all it turned out pretty well. I sanded down a little too far only a couple places on the edges of the added bow and stern strips. Otherwise, I didn't damage any fibreglass and the weave is mostly invisible.

This weekend I undertook the much more enjoyable task of flipping the canoe over to an upright position. Saturday I cobbled together three padded cradles in the shape of the two #5 stations near the ends and the #0 station in the middle. Then today I enlisted Tracy again to help with the flip. I had to chisel off some extra epoxy that had dripped down to form little puddles around the bow and stern stems in order to separate the canoe from the strongback. The ends of the stems will be cut off eventually anyways so it didn't damage the canoe. I was a little worried that I would have trouble lifting the canoe off of the station molds so I just unscrewed all of the station molds from the strongback first. This seemed to be a great idea until Tracy and I lifted the canoe up and flipped it over. At this point all of the heavy plywood station molds tipped over into the canoe. I was worried that the hull was going to crack, but it just bent a little and held strong. A couple of the tipping molds did leave little dents in the cedar strips on the inside though. D'oh. I think they will mostly sand out.

It was an amazing day here today. Its January and it was about 75deg F (25deg C) and sunny. Perfect for setting the shell out on the strip of grass in front of the house for a photo before returning it to the garage to finish.

Sunday, November 9, 2008

Fibreglass


Ever since I started building the canoe in my half of the garage, dust, cobwebs, termite droppings and debris have been falling from the ceiling onto it. Up until now it hasn't been a problem because I just wipe it away and continue on, but for the fibreglass and epoxy step debris falling from the ceiling won't do. So I spent most of the day Saturday cleaning out the garage literally from top to bottom. I don't think it's ever been cleaned since it was built in the 1930's. I took the shop vac to the ceiling, framing and roof joists and just about everything else above canoe level. Afterward I was still worried about stuff falling from above so I tacked plastic sheeting to the beams above the canoe.
On Sunday, I got all my supplies ready - resin and hardener, paint brushes, plastic squeegee, mixing pots, disposable gloves, mixing containers, face masks, etc. and recruited Tracy to be my Chief Mixer. The 6 oz. fibreglass sheet was unrolled directly on to the canoe. It is actually quite delicate and any pulling, tugging or touching can quickly deform the natural weave of the fibres. We carefully laid it out and there didn't seem to be any major creases, which made me happy. With Tracy mixing the resin and hardener for me and cleaning my brushes and containers all I had to worry about was getting the resin onto the boat - just enough for the 'glass and wood to soak it up without drying out, but not too much that it pooled and dripped. Tracy also kept track of timing and where I was on the hull so that I could return to a previously applied area after 30 minutes to squeegee off the excess epoxy. I certainly couldn't have done this alone. At first we were working on a 20 minute interval as recommended by the book and I was finding it hard to keep up with the schedule, barely finishing applying the resin to one section before having to go back to squeegee a previous. Since the weather was fairly cool though, the epoxy was not curing very quickly and I found after the first couple sections that 30 minutes worked out better.

All in all the process went fairly well. There are no major bubbles, dry spots, cracks or runs in the 'glass. There are quite a few drips that formed even after I squeegeed that I will have to sand off before the next coat, but that is probably the worst of it. Before I put on the next two coats I think I will apply a couple extra strips of fibreglass fabric to the bow and stern for extra strength and durability in those locations.

Oh yeah, and I chose a name for the canoe. You can see it (upside down for now) in a couple of the pictures.

Sunday, November 2, 2008

raising the grain


I have just finished with most of the sanding on the outside of the hull. After planing down the edges of the strips I power-sanded with 80-grit paper on the random orbit sander. There is a bag to collect the dust, but it only catches about half of it. The rest ends up covering me and just about everything else in the garage. At least the plastic sheeting kept most of it off our neighbour's stuff. After sanding I could still see several gaps between the strips and I decided that I better fill them in with epoxy and cedar dust. Otherwise I could get air bubles under the fibreglass, which would be a disaster. So then I ended up sanding with the custom-made sanding blocks I put together (two blocks of plywood clamping together the edges of a sheet of sandpaper and tightened with a bolt and wingnut) and more power-sanding. Leaving on extra epoxy could cause the finish to look splotchy after I am done glassing so I had to balance getting off all of the extra epoxy and sanding the wood down too much.

Finally, after all of this I was able to wet-out the hull with a water-dampened cloth to raise the grain for final sanding. Wow, it has a great colour and the grain looks amazing! And the wet cedar smelled terrific. If I actually wore cologne I would want it to smell like that. Too bad the boat won't smell that way after it is encased in fibreglass and epoxy!

Sunday, October 19, 2008

From boards to a boat


I've been working on building this canoe for almost 10 months and up until now I feel like I have just been putting the pieces together in the shape of a boat. In the last two weekends though I have started to turn the collection of wood strips into a real craft with flowing lines that will actually someday grace the water. Last weekend I shaped the rough-cut outer stems into the aerodynamic leading and trailing edges of the canoe. It was some of the hardest work so far as it was a lot harder to use the spokeshave on the cherry hardwood than it was for the softer cypress and I had to be careful as I blended the stems into the hull not to damage to the edges of the cedar strips. Then, this weekend I completed the tedious, but gratifying task of pulling all of the staples - about 700 of them. I was just slightly worried that this step would result in the boat springing apart, but that did not happen. With that done I pulled out the block plane and shaved off all of the rough corners on the canoe where the edges of each strip come together with it's neighbours. It left a mountain of cedar shavings on the floor. While the hull is still rough it looks better already with the rounded edges. Next step will be to fill in the narrow gaps between some of the strips with colour-matched epoxy. The strips come together pretty tightly over much of the hull but there are some fair-sized gaps that need to be filled where the strips turn around the bilge amidship. I tested out the random orbit sander with 80-grit paper on the first two stations on one side to collect some cedar dust to mix with the epoxy.

Saturday, October 4, 2008

Exterior Stems


Finally done with the strips, I have been fitting the exterior stems over the past couple weekends. I had steam bent these pieces out of cherry at the same time as the inner stems back in March or so and they've been waiting for me since then.
First task was to cut the stems rougly to length, then taper the keel-side end slightly so that it would not be wider than the inner stem as I cut away the cedar strips to allow it to fit. Next I cut a mortice into the hull starting roughly at the point where the stems turn sharply toward the bottom of the hull and ending about an inch shy of the end of the inner stem. Going too far would result in a hole through the hull! I used a 1/8" chisel, a sharp utility knife and a narrow sanding stick for this job and constantly dry-fit the stem to make sure it fit as perfectly as possible. The tedium paid off with a pretty good fit on both ends of the hull.
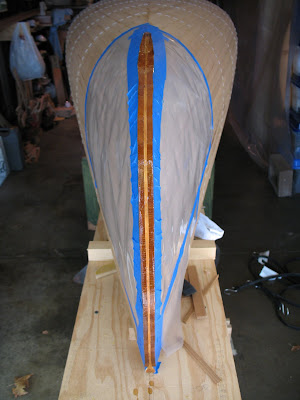
Next task was to epoxy the stems on. Canoecraft recommends using no.6 screws to firmly secure the outer stems while the epoxy dries and then to remove them and fill the holes with plugs. I wasn't confident in my ability to do this skillfully and I have read about other people simply strapping the stems down instead of using screws. This has the benefit of not having to remove the screws and plug the holes. I picked up some heavy duty rubber straps from OSH and tried a dry run. The straps seemed to work pretty well holding the stems in place securely so I decided to go for it. I am slightly concerned that the straps might be too tight and squeeze out too much epoxy, but after the fact I don't think that is the case. I covered the hull with painters tape and plastic too prevent most of the epoxy from getting on the hull. Then I brushed a few layers of unthickened epoxy on the stem ends to allow them to soak it up while I mixed up another batch of epoxy thickened with microfibres to the "consistency of peanut butter". This was painted on one of the mating surfaces and the stem was strapped down. I'll have to wait till tomorrow to see how well it has worked out...

Monday, September 1, 2008

Touchdown!


The long weekend was spent finishing off all of the stripping and "closing the football" on the bottom of the boat. To fit in the last piece I planed the cove edge off of the penultimate strip and planed and sanded the final 3-piece strip down to fit into the remaining slot (after a lot of measuring and marking). Tracy was there to take a couple photos as we fit in this final piece. It fit like a glove (with a couple short fingers). I imagine this is what hammering in the last spike on the trans-Canada railroad must have felt like! I am pretty pleased with the way things look.
Actually, I am far from done. The book Canoecraft says at this stage I am only about 1/3 of the way! It seems like it must be more than that. I think maybe they don't include building the strongback. Hopefully. Still, I can't believe I've made it this far. The most common question I get from the neighbourhood stoppers-by these days is "Looks good, how long have you been working on that, when is it going to be done??" My new estimate is "some time in the Spring". It sure feels good to reach this mile stone though.

Sunday, May 11, 2008

More Strips...


I've been adding strips 2 or 3 at a time over the last week. I took Saturday off from working on the boat as I ran the Quicksilver 50km race in San Jose in the morning with 5,440 ft of elevation gain (3:51:58, 1st) and the legs were a little too tired/sore to be crouching down beside the canoe. But I was able to get a few strips on on Sunday.

This part of the process is pretty easy. I'm just starting to make the turn of the bilge and I can see how the strips are going to be twisted toward the bow and stern. The staples are holding fairly well but I used a few clamps on the latest strip to hold it tight to the forms.

In the second picture, you can see the flat grain accent strip that I am using on each side of the canoe against the rest of the end grain strips.

Sunday, April 27, 2008

I've started stripping

It has been a little while since my last post, but that doesn't mean I haven't gotten anything done. My time has been taken up by a few other things in the last months, but most weekends in April I have been able to get out to the garage to do some stripping. I have had a lot of good comments from people passing by too. I've found its a very good way to meet people in the neighbourhood!

I'm still talking about building my canoe of course. The first thing I have done since my last post was to start shaping the stems. I worked on the bottom half of the bow and stern stems for almost a whole weekend it seems, shaving down the corners with spokeshave and sanding stick so that I will have a rolling bevel on both sides from the gunnels down to the bottom of the hull. The bevel provides a flat area to glue the strips to at each end of the boat and gives the bow and stern a pointed aerodynamic end. Sitting at my desk on the Monday after I realised that my arms were quite tired from all of the sanding. I think when I am more experienced I will be able to do it a lot faster. To begin with I was too nervous about taking off too much wood with with the spokeshave.

With the stems shaped about half way up, I was ready to put on the sheerline strips. (Those are the two along the edges of the hull) I found out immediately that simply stapling the strips on to the forms was not going to work as the strip kept springing back and the staples were popping out of the forms. I solved this problem by cutting out several L-shaped brackets to clamp the strips to the forms. Then I could not decide if I wanted to use staples at all or if I wanted to try the "stapless" method of just using clamps. I ended up cutting out just about all of the brackets that I would need before finally deciding that I would be better off using the staples for my first boat at least. Anyhow, my bracket-cutting efforts would not be wasted as I used them to clamp the sheer strips firmly to the stations before stapling them in place. I will leave the sheer strips clamped this way to keep them secure until the boat is ready to be fibreglassed. Also, I will have some brackets available to clamp the strips as I make the turn around the bilge, where there is a lot of twist in the strips and the staples alone will probably not be able to hold them.

After getting the two sheer strips on, I was able to get a couple more strips on on each side. Once I got the hang of it it went pretty smoothly, laying down a bead of Elmers wood glue in the upward facing cove edge of the strip below and pressing the next strip down firmly while putting in the staples. It was close to 30 degC out today and it started to pretty warm in the garage. When it comes time to fibreglass I'm going to have to start early in the morning or else the epoxy will cure in a few minutes I think.

As always there were lots of people asking me what I was doing while I worked. Most people call the project "ambitious". I met one fellow from Minnesota today who says he has a carbon-fibre canoe but he hasn't found many places to use it since moving to California. hmm. Another elderly lady said to me that I better work faster because summer is almost here!


Sunday, March 2, 2008

Bending the stems


With the bow and stern forms now cut out with the clamping holes I was able to go about bending the stems this past weekend. As described in Canoecraft, I set up my makeshift steamer using a 3" dia. pipe a few inches longer than the wood strips used to make the laminated stems and the electric kettle from the kitchen. There are two sets of stems - the inside stems and the outside stems. The inside stems are made up of 3 strips of 1/4" x 3/4" Port Orford Cedar. It is these that the WRC strips will be attached to at the bow and stern of the canoe. The outer stems are made of 3 strips each of 1/4" x 7/8" Cherry that seal the end of the WRC strips once they have been laid on the forms and they also provide some impact resistance for the canoe.
I soaked the strips over night to soften them up, then stuck them in the PVC pipe in the morning with nozzle of the kettle inserted in the lower end of the pipe. The top end was plugged with rags and the kettle set to boiling with the switch held on. Each set of strips were steamed for about 25 minutes then removed and quickly wrapped around the forms. While I held the stems against the forms, Tracy tightened the clamps. I was amazed at how easily the stems bent. All in all it was a very simple process and it seems to have worked out well.

Monday, January 14, 2008

Ripping the boards and milling the strips


It was a big weekend of work on the canoe. A while ago Andy Orsini, a buddy of mine from Santa Cruz and a fine woodworker/ wicked surfer, convinced me that it would be fun to buy the Western Red Cedar as boards and mill it into strips myself. So this past weekend I persuaded him to help me out and we headed over to Jackel Enterprises in Watsonville with a 12 ft long 2x12 plank strapped to the top of my VW Rabbit to pick out some boards. The guys at Jackel were friendly, helpful and meticulous about their grammar. (I was corrected to say "How many boards do you have?", not "How many boards do you got? oops.) We picked out the finest 18 ft boards of WRC they had; one 2x6 and the other 2x10. We also bought a 2x6 x 10 ft board of Port Orford Cedar for the inside stems. Port Orford Cedar is actually a cypress that grows in Oregon, but it is a beautiful and durable and lightweight wood. We strapped the 18 ft boards back on top of my 14 1/2 ft long car and headed back along hwy 1 to Andy's shop in Capitola. Now the fun began.

Turning 2 boards into 78 1/4" x 7/8" strips involves a lot of milling. From our careful pre-calculations we determined that we would get 80 strips out, but we lost two due to a couple early mishaps. After practicing with making the stem strips and the two early mistakes things went quite smoothly, most of which I can thank Andy for. WRC handles very well. There was very little fraying or chipping running through the machines and we ran it through a lot of machines. For a while it just seemed like I was turning money into sawdust.

Since we wanted end grain strips we cut the quarter sawn boards into smaller 1" x 2" boards using the table saw and then cut 5 strips exactly 9/32" wide and 7/8" high out of each of these. All of the strips were numbered in order as they came off the table saw so that I will be able to match the grain on both sides of the canoe as I lay the strips on the mold. These 9/32" strips were then fed through the planer once on each side to take off 1/64" on each side and bring the final width of the strips down to 1/4". (We were careful to renumber the strips as they came off the planer as well!) That was it for Saturday.

Sunday I headed back over the hill to Santa Cruz to finish up. It was taking a little longer than we had planned, but so far turning out really well. Today we routered the bead and cove edges into the strips so that they will fit snugly together without spaces. After setting up the table, router, feather boards, making dozens of minuscule adjustments and going through several tests on scrap pieces we finally got started on the last step in this process: pulling the 78 strips through the router once on each side. For those who haven't done the math, that works out to 2808 ft of wood strips! With the router throwing cedar sawdust in the air it felt like I was trapped in a very dry but sweet-smelling snowglobe and the wood just kept coming.

It was 9pm on Sunday night that I finally dropped Andy off at home and headed back over the hill to Mountain View with the wood once again strapped to the top of the car, this time a considerably lighter load. The strips turned out fantastically and I learned a whole lot about wood and woodworking from Andy. It was a great weekend for me, unfortunately it was kind of like work for Andy. I owe him a pair of hands for one of his jobs in the future.

Next up for the project: tracing and cutting out the station molds.

Sunday, January 6, 2008

Cedar Strip Canoe Project Has Begun!

This is the first post to chronicle the building of my first wooden boat. It will be a 15' cedar strip canoe made from 1/4" x 13/16" strips of Western Red Cedar encased in a single layer of clear fibreglass for rigidity and waterproofing. I bring almost no experience to this endeavour, but I from what I read, this type of project is doable for someone of my level. The plans that I have ordered from Bear Mountain Canoes in Peterborough, Ontario suggest that is should take roughly 200 hours. I'm banking on about double that for myself. The design is called the "15' Bob's Special" and the lines for this boat were lifted off of an old Chestnut design. I like it for its classic look and size.

I like the size for a couple of reasons. First, the finished weight is only 45-50 lbs, which I should be able to portage relatively easily and Tracy and I like to travel light. Second, it is about the only design that I could build in my limited work space (half of a garage). I have read that a builder should plan for about 3 ft of space on each side of the canoe as it is being built. My space is only about 20 ft long by 7 to 8 ft wide. The canoe beam is 3 ft, so I will be a little bit squeezed and I'm hoping things will work out.
Things have started out well at least. I spent a couple weekends putting together the strongback, from 3/4" sheets of plywood and lots of screws. The strongback is the rigid bench that supports the station molds around which the strips are layed to make the hull. There are couple of photos of the all but completed strongback above. The first shows it lying upside down and second right side up. All that remains to be done for the strong back is to screw on the top boards and anchor it to the floor. You can also see in the picture how small the workspace is. I used this first part of the project to gain some confidence and I am fairly pleased with how it came out.