Thursday, October 30, 2008
Wednesday, October 22, 2008
Pacific International Quilt Fair
Sorry to interrupt the canoe narrative.....
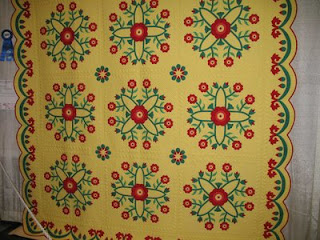
This year it was PIQF Santa Clara, just 8 miles from our house! I tried to look up close at any hand applique since that's what I've been learning lately. Wow! I have a lot of practicing to do!
My favorites are more traditional patterns, but most of what I saw was more innovative. Really amazing!!!
Here are the ones that caught my eye....

Sunday, October 19, 2008
From boards to a boat


I've been working on building this canoe for almost 10 months and up until now I feel like I have just been putting the pieces together in the shape of a boat. In the last two weekends though I have started to turn the collection of wood strips into a real craft with flowing lines that will actually someday grace the water. Last weekend I shaped the rough-cut outer stems into the aerodynamic leading and trailing edges of the canoe. It was some of the hardest work so far as it was a lot harder to use the spokeshave on the cherry hardwood than it was for the softer cypress and I had to be careful as I blended the stems into the hull not to damage to the edges of the cedar strips. Then, this weekend I completed the tedious, but gratifying task of pulling all of the staples - about 700 of them. I was just slightly worried that this step would result in the boat springing apart, but that did not happen. With that done I pulled out the block plane and shaved off all of the rough corners on the canoe where the edges of each strip come together with it's neighbours. It left a mountain of cedar shavings on the floor. While the hull is still rough it looks better already with the rounded edges. Next step will be to fill in the narrow gaps between some of the strips with colour-matched epoxy. The strips come together pretty tightly over much of the hull but there are some fair-sized gaps that need to be filled where the strips turn around the bilge amidship. I tested out the random orbit sander with 80-grit paper on the first two stations on one side to collect some cedar dust to mix with the epoxy.
Saturday, October 4, 2008
Exterior Stems


 Finally done with the strips, I have been fitting the exterior stems over the past couple weekends. I had steam bent these pieces out of cherry at the same time as the inner stems back in March or so and they've been waiting for me since then.
First task was to cut the stems rougly to length, then taper the keel-side end slightly so that it would not be wider than the inner stem as I cut away the cedar strips to allow it to fit. Next I cut a mortice into the hull starting roughly at the point where the stems turn sharply toward the bottom of the hull and ending about an inch shy of the end of the inner stem. Going too far would result in a hole through the hull! I used a 1/8" chisel, a sharp utility knife and a narrow sanding stick for this job and constantly dry-fit the stem to make sure it fit as perfectly as possible. The tedium paid off with a pretty good fit on both ends of the hull.
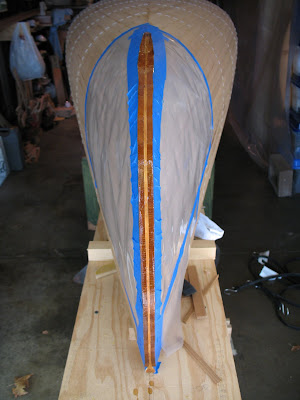
Next task was to epoxy the stems on. Canoecraft recommends using no.6 screws to firmly secure the outer stems while the epoxy dries and then to remove them and fill the holes with plugs. I wasn't confident in my ability to do this skillfully and I have read about other people simply strapping the stems down instead of using screws. This has the benefit of not having to remove the screws and plug the holes. I picked up some heavy duty rubber straps from OSH and tried a dry run. The straps seemed to work pretty well holding the stems in place securely so I decided to go for it. I am slightly concerned that the straps might be too tight and squeeze out too much epoxy, but after the fact I don't think that is the case. I covered the hull with painters tape and plastic too prevent most of the epoxy from getting on the hull. Then I brushed a few layers of unthickened epoxy on the stem ends to allow them to soak it up while I mixed up another batch of epoxy thickened with microfibres to the "consistency of peanut butter". This was painted on one of the mating surfaces and the stem was strapped down. I'll have to wait till tomorrow to see how well it has worked out...
Subscribe to:
Comments (Atom)


