TRI to keep it WILD - Raising funds for Nature Conservancy of Canada

Tuesday, December 2, 2008

The Traditional Thanksgiving Road Trip

We seem to have begun a traditon of turkey day road tripping. As we don't own a roasting pan and our families are far away (VERY far away at the moment) it's a good opportunity for a mini-vacation. This year we went to San Diego.
A bizarre scene at the Hotel Del Coronado.


Yep, November in California is rough.


The aviaries at the San Diego Zoo are really great.


Polar Bear Plunge!


Guess this warthog ate too much turkey.

Botanical Garden in Balboa Park.

After a 9-hour drive on Thursday including a hellish slog through LA, we got to San Diego in time to stroll through Balboa Park as the sun went down. After that we went in search of a Thanksgiving feast. Unfortunately "Little Italy" was officially closed so we headed downtown. We found a nice hotel restaurant that was open and had waldorf salad, squash soup, salmon, and pecan pie. Mmmmm.

On Friday after a run in the park, we met our friend Rich at the Zoo. The place is so huge, I don't know how you could see everything in one day! We did our best not to get run down by a zoo-mobile. I knew the visit was complete once I'd spent $0.50 to destroy a penny in the name of the ultimate cheesy souvenir. I think I already lost it.

After the zoo we drove over to Coronado Island to check out the Hotel Del (I can call it that since I've been to San Diego once or twice before in the company of a local.). Then we tried Little Italy again and this time the neighborhood was officially open. We had pizza and beer at Filippi's Pizza Grotto. The line was down the block! But we waited for the chance to dine under hundreds of chianti bottles hanging from the ceiling. Guess you don't see THAT just anywhere.

For our last day we decided to take in some history. We saw the official start of the El Camino Real which runs right past our house all the way up here. It starts where Padre Junipero Serra founded the Mission of San Diego de Alcala in San Diego. Not that thrilling. Also hit Cabrillo National Monument at Point Loma and Old Town San Diego. There are some museums there with quite a lot of interesting objects and information if you can get past the cheesy junk shops and hordes of people. We did a little frontier-style gambling, talked to a coffin-maker, and sent morse-code messages at the Wells Fargo museum. FUN! We topped it off with a visit to the Karl Strauss brewery and the new James Bond movie downtown.

Hoping to avoid a traffic debacle on the way home, we took an alternate route that looped around Edwards Air Force Base (check your google map) and were close to seeing the Space Shuttle landing there, but the timing wasn't quite right. A mere 9 hours later we were home!

I'm thankful that you're still reading, but this is the end.

Sunday, November 9, 2008

Fibreglass


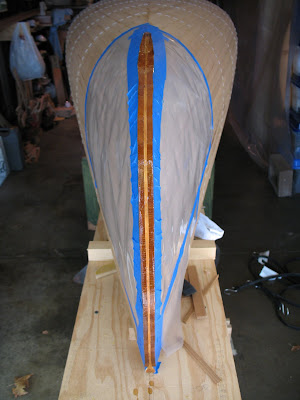
Ever since I started building the canoe in my half of the garage, dust, cobwebs, termite droppings and debris have been falling from the ceiling onto it. Up until now it hasn't been a problem because I just wipe it away and continue on, but for the fibreglass and epoxy step debris falling from the ceiling won't do. So I spent most of the day Saturday cleaning out the garage literally from top to bottom. I don't think it's ever been cleaned since it was built in the 1930's. I took the shop vac to the ceiling, framing and roof joists and just about everything else above canoe level. Afterward I was still worried about stuff falling from above so I tacked plastic sheeting to the beams above the canoe.
On Sunday, I got all my supplies ready - resin and hardener, paint brushes, plastic squeegee, mixing pots, disposable gloves, mixing containers, face masks, etc. and recruited Tracy to be my Chief Mixer. The 6 oz. fibreglass sheet was unrolled directly on to the canoe. It is actually quite delicate and any pulling, tugging or touching can quickly deform the natural weave of the fibres. We carefully laid it out and there didn't seem to be any major creases, which made me happy. With Tracy mixing the resin and hardener for me and cleaning my brushes and containers all I had to worry about was getting the resin onto the boat - just enough for the 'glass and wood to soak it up without drying out, but not too much that it pooled and dripped. Tracy also kept track of timing and where I was on the hull so that I could return to a previously applied area after 30 minutes to squeegee off the excess epoxy. I certainly couldn't have done this alone. At first we were working on a 20 minute interval as recommended by the book and I was finding it hard to keep up with the schedule, barely finishing applying the resin to one section before having to go back to squeegee a previous. Since the weather was fairly cool though, the epoxy was not curing very quickly and I found after the first couple sections that 30 minutes worked out better.

All in all the process went fairly well. There are no major bubbles, dry spots, cracks or runs in the 'glass. There are quite a few drips that formed even after I squeegeed that I will have to sand off before the next coat, but that is probably the worst of it. Before I put on the next two coats I think I will apply a couple extra strips of fibreglass fabric to the bow and stern for extra strength and durability in those locations.

Oh yeah, and I chose a name for the canoe. You can see it (upside down for now) in a couple of the pictures.

Sunday, November 2, 2008

raising the grain


I have just finished with most of the sanding on the outside of the hull. After planing down the edges of the strips I power-sanded with 80-grit paper on the random orbit sander. There is a bag to collect the dust, but it only catches about half of it. The rest ends up covering me and just about everything else in the garage. At least the plastic sheeting kept most of it off our neighbour's stuff. After sanding I could still see several gaps between the strips and I decided that I better fill them in with epoxy and cedar dust. Otherwise I could get air bubles under the fibreglass, which would be a disaster. So then I ended up sanding with the custom-made sanding blocks I put together (two blocks of plywood clamping together the edges of a sheet of sandpaper and tightened with a bolt and wingnut) and more power-sanding. Leaving on extra epoxy could cause the finish to look splotchy after I am done glassing so I had to balance getting off all of the extra epoxy and sanding the wood down too much.

Finally, after all of this I was able to wet-out the hull with a water-dampened cloth to raise the grain for final sanding. Wow, it has a great colour and the grain looks amazing! And the wet cedar smelled terrific. If I actually wore cologne I would want it to smell like that. Too bad the boat won't smell that way after it is encased in fibreglass and epoxy!

Thursday, October 30, 2008

Wednesday, October 22, 2008

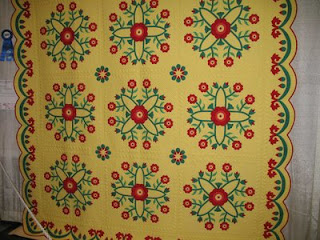
Pacific International Quilt Fair


Sorry to interrupt the canoe narrative.....

This year it was PIQF Santa Clara, just 8 miles from our house! I tried to look up close at any hand applique since that's what I've been learning lately. Wow! I have a lot of practicing to do!

My favorites are more traditional patterns, but most of what I saw was more innovative. Really amazing!!!

Here are the ones that caught my eye....


Sunday, October 19, 2008

From boards to a boat


I've been working on building this canoe for almost 10 months and up until now I feel like I have just been putting the pieces together in the shape of a boat. In the last two weekends though I have started to turn the collection of wood strips into a real craft with flowing lines that will actually someday grace the water. Last weekend I shaped the rough-cut outer stems into the aerodynamic leading and trailing edges of the canoe. It was some of the hardest work so far as it was a lot harder to use the spokeshave on the cherry hardwood than it was for the softer cypress and I had to be careful as I blended the stems into the hull not to damage to the edges of the cedar strips. Then, this weekend I completed the tedious, but gratifying task of pulling all of the staples - about 700 of them. I was just slightly worried that this step would result in the boat springing apart, but that did not happen. With that done I pulled out the block plane and shaved off all of the rough corners on the canoe where the edges of each strip come together with it's neighbours. It left a mountain of cedar shavings on the floor. While the hull is still rough it looks better already with the rounded edges. Next step will be to fill in the narrow gaps between some of the strips with colour-matched epoxy. The strips come together pretty tightly over much of the hull but there are some fair-sized gaps that need to be filled where the strips turn around the bilge amidship. I tested out the random orbit sander with 80-grit paper on the first two stations on one side to collect some cedar dust to mix with the epoxy.

Saturday, October 4, 2008

Exterior Stems


Finally done with the strips, I have been fitting the exterior stems over the past couple weekends. I had steam bent these pieces out of cherry at the same time as the inner stems back in March or so and they've been waiting for me since then.
First task was to cut the stems rougly to length, then taper the keel-side end slightly so that it would not be wider than the inner stem as I cut away the cedar strips to allow it to fit. Next I cut a mortice into the hull starting roughly at the point where the stems turn sharply toward the bottom of the hull and ending about an inch shy of the end of the inner stem. Going too far would result in a hole through the hull! I used a 1/8" chisel, a sharp utility knife and a narrow sanding stick for this job and constantly dry-fit the stem to make sure it fit as perfectly as possible. The tedium paid off with a pretty good fit on both ends of the hull.
Next task was to epoxy the stems on. Canoecraft recommends using no.6 screws to firmly secure the outer stems while the epoxy dries and then to remove them and fill the holes with plugs. I wasn't confident in my ability to do this skillfully and I have read about other people simply strapping the stems down instead of using screws. This has the benefit of not having to remove the screws and plug the holes. I picked up some heavy duty rubber straps from OSH and tried a dry run. The straps seemed to work pretty well holding the stems in place securely so I decided to go for it. I am slightly concerned that the straps might be too tight and squeeze out too much epoxy, but after the fact I don't think that is the case. I covered the hull with painters tape and plastic too prevent most of the epoxy from getting on the hull. Then I brushed a few layers of unthickened epoxy on the stem ends to allow them to soak it up while I mixed up another batch of epoxy thickened with microfibres to the "consistency of peanut butter". This was painted on one of the mating surfaces and the stem was strapped down. I'll have to wait till tomorrow to see how well it has worked out...

Monday, September 1, 2008

Touchdown!


The long weekend was spent finishing off all of the stripping and "closing the football" on the bottom of the boat. To fit in the last piece I planed the cove edge off of the penultimate strip and planed and sanded the final 3-piece strip down to fit into the remaining slot (after a lot of measuring and marking). Tracy was there to take a couple photos as we fit in this final piece. It fit like a glove (with a couple short fingers). I imagine this is what hammering in the last spike on the trans-Canada railroad must have felt like! I am pretty pleased with the way things look.
Actually, I am far from done. The book Canoecraft says at this stage I am only about 1/3 of the way! It seems like it must be more than that. I think maybe they don't include building the strongback. Hopefully. Still, I can't believe I've made it this far. The most common question I get from the neighbourhood stoppers-by these days is "Looks good, how long have you been working on that, when is it going to be done??" My new estimate is "some time in the Spring". It sure feels good to reach this mile stone though.

Saturday, August 30, 2008

filling in


I'm almost done with the strips! Today Tracy helped me bend the three final strips on one of the lower strips (without glue) so that I can fit the pre-made piece into the final gap tomorrow.

Sunday, August 10, 2008

Centreline


This weekend I cut the centreline. Like a lot of the steps in building this boat, this was a step that I kind of dreaded but it turned out to be pretty easy. That said I'm pretty tired now. It gets hot in that garage, especially with two 150W lightbulbs shining on me for several hours. This step is needed to trim off the edges of all the strips hanging over the centre. It went like this:
Mark a line about an inch off the true centreline and chisel down to it. Then mark the true centreline using two methods: transfering the centreline on each station mold to the outside of the hull using a little measuring jig and stretching a string between two nails tacked on to the no. 6 stations. Once the line was drawn on in ink I got the chisel out again and shaved the strips down to about 1/8" from the line. Using the chisel is quite satisfying and quickly results in a big pile of cedar shavings on the floor. At this stage, the book suggests using a rabbet plane to bring it down to the line, but an online check of woodcraft.com showed that one would cost me about $90, so instead I used a series of sanding blocks, 60, 120 and 200 grit, which was free. Maybe a little more work this way but it sure resulted in a perfect vertical and straight cut.
Next is another step I've been dreading: fitting in the strips on the other side to "close the football".

Sunday, August 3, 2008

Back from Brazil


We're back from our month in Brazil. It was a nice change of pace from working all day, if not exactly relaxing. We covered lots of ground and saw lots of stuff. Tracy put some captions on some of our pictures. They can be seen here:


Now we've been back in Mountain View for two weeks and I've been trying to get ahead on the canoe. I have just about all of the strips on one side on now, except for maybe one or two. I've been able to do it by myself by bending the strips into place carefully and clamping them down with L-shaped clamps at 3 stations, allowing me to put the staples in at the other stations to secure each strip. I only had help on one when Scott (another one), who lives around the corner, came by to talk while I was in the middle of a strip. It was definitely easier with another set of hands. He is an interesting guy, with a lot of the same interests. I went over to his garage today to check out the little 16ft "pocket cruiser" sailboat he keeps in there. Maybe some day this fall he'll take me out for a sail!

Next step on the canoe is to trace the centre-line back on to the strips and cut along the line, as perfectly straight as possible.

Here are couple of the latest photos as well as an old one showing the L-shaped brackets held on with C-clamps.

Thursday, June 19, 2008

A month off


Its been a while since I have last posted to the blog. That is because adding the strips has been a bit of a slow process. My technique of stapling the strips and the clamping them down with masking tape means I have to wait about at least an hour between strips for the glue to dry hard enough to add the next strip. So even on the weekends I have only been able to add a few strips per day. That said I've got about 25 strips on either side now and it is starting to look a lot more like a canoe. I've got the strips up both sides covering the stems now so the next thing to do is to fill in the "football" shape on the bottom. This will be a tricky part because the strips will come together from each side at the centreline and will need to be beveled in two directions and fit precisely together.

Tracy and I are leaving for a month of traveling around Brazil tomorrow morning so the project is on hold until we get back. I am determined to make good progress on the canoe over the second half of the summer so that I can get the canoe sanded, fibreglassed and flipped off the molds in the fall.

It is almost the longest day of the year here in California and it sure feels like summer with temperatures in the mid-90s (30s celcius) today. Its almost a shame to be heading to the Southern Hemisphere where the days will be shorter and the temperatures a little cooler. No I take that back - this trip is going to be great!

So attached are a couple of the latest photos of the canoe. Perhaps we'll add some Brazil photos in the next couple weeks. And then I'll make lots of progress on the canoe in August. Until then...

Sunday, May 11, 2008

More Strips...


I've been adding strips 2 or 3 at a time over the last week. I took Saturday off from working on the boat as I ran the Quicksilver 50km race in San Jose in the morning with 5,440 ft of elevation gain (3:51:58, 1st) and the legs were a little too tired/sore to be crouching down beside the canoe. But I was able to get a few strips on on Sunday.

This part of the process is pretty easy. I'm just starting to make the turn of the bilge and I can see how the strips are going to be twisted toward the bow and stern. The staples are holding fairly well but I used a few clamps on the latest strip to hold it tight to the forms.

In the second picture, you can see the flat grain accent strip that I am using on each side of the canoe against the rest of the end grain strips.